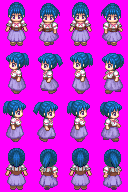
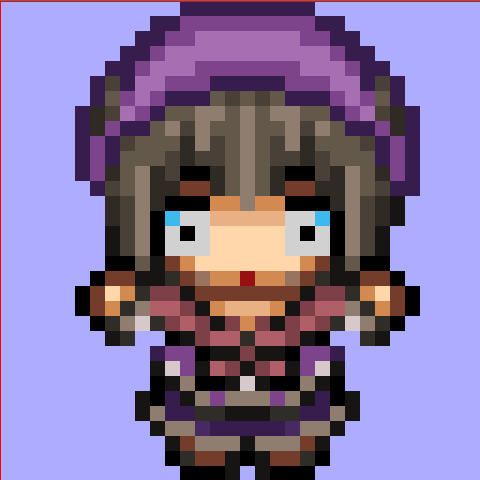
Envision, Create, Share

Welcome to HBGames, a leading amateur game development forum and Discord server. All are welcome, and amongst our ranks you will find experts in their field from all aspects of video game design and development.

Frankenspriting Workshop

FRANKENSPRITING
The easy way to get a lot done in a little time


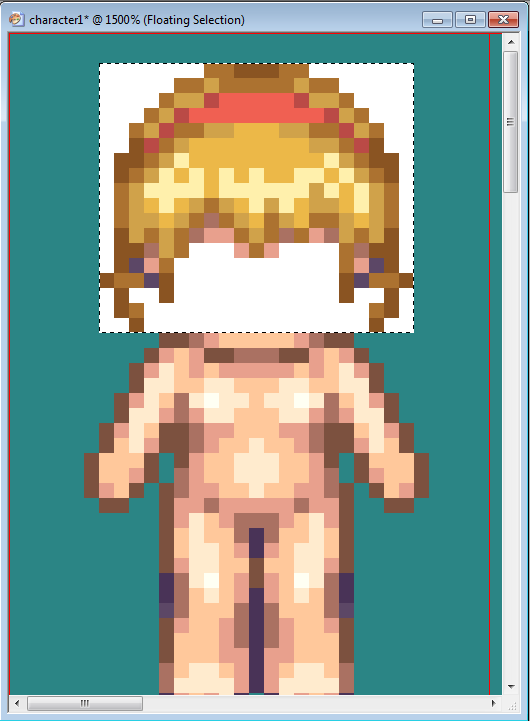
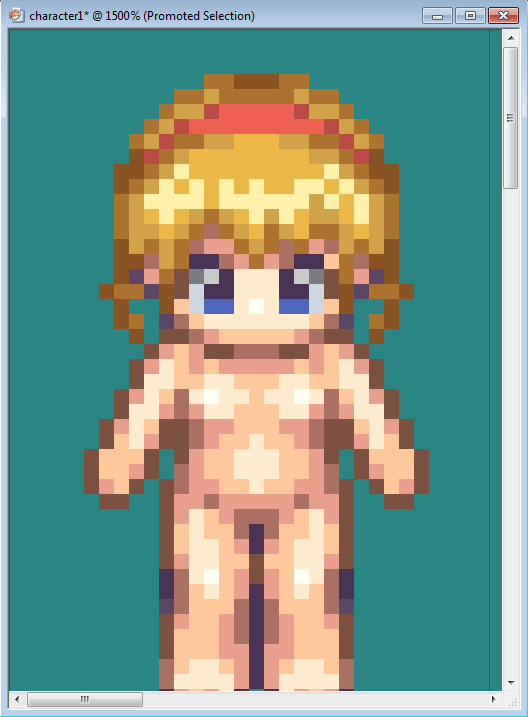
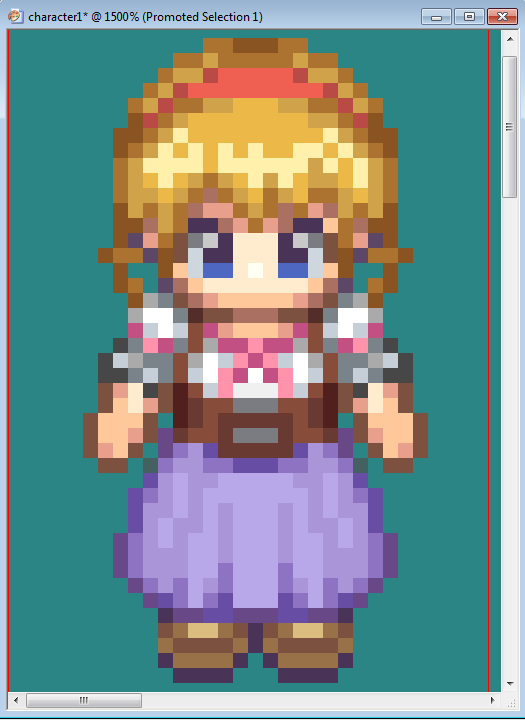
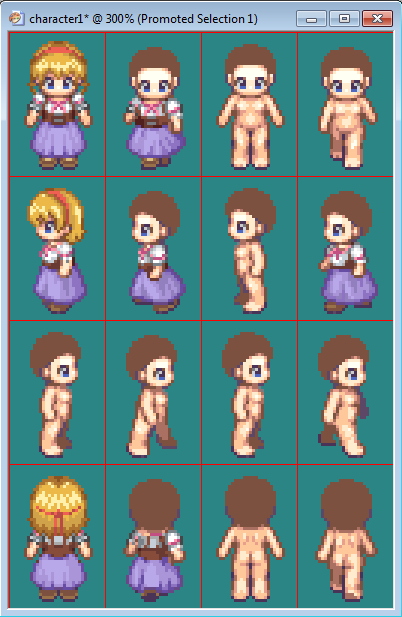
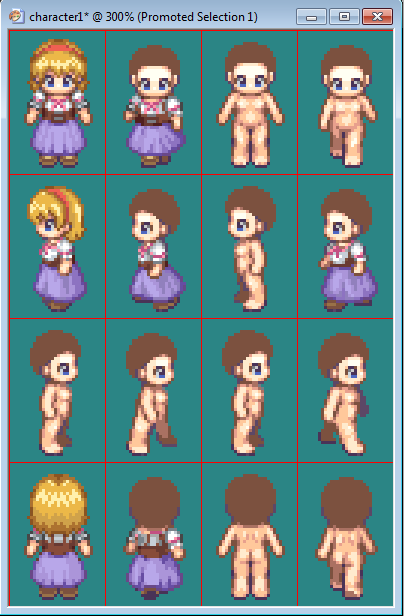
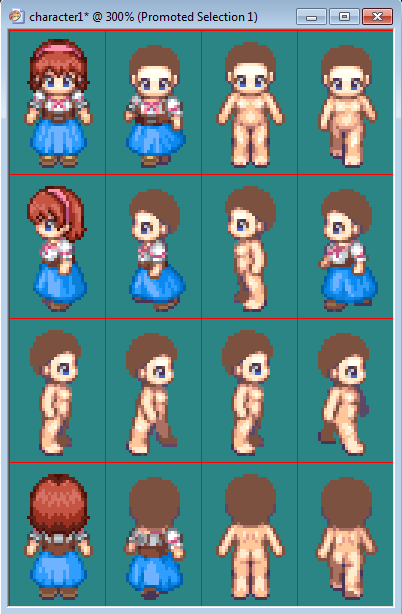
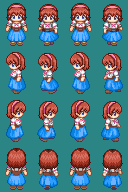
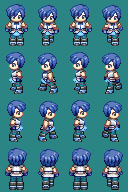
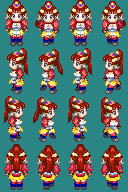
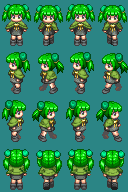
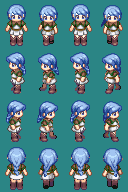
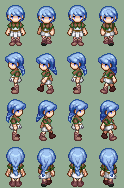
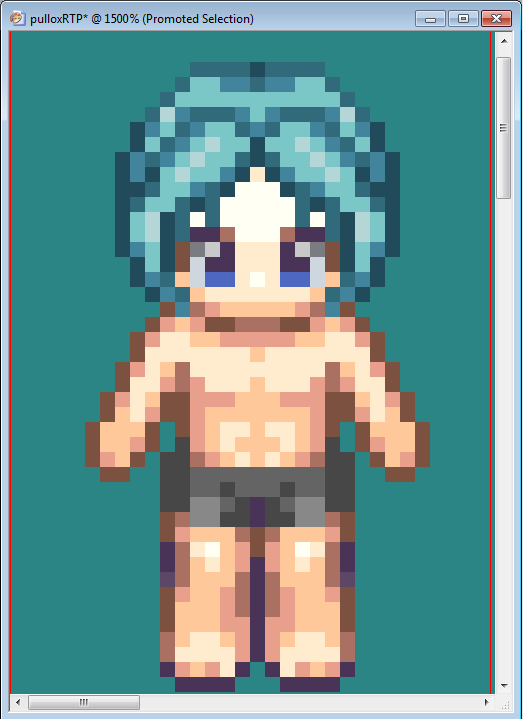
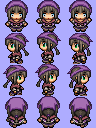
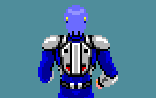
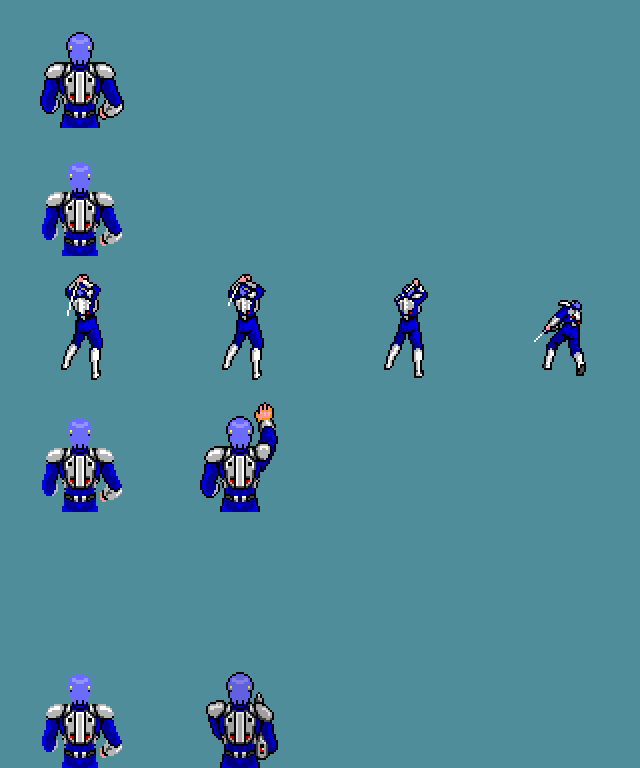
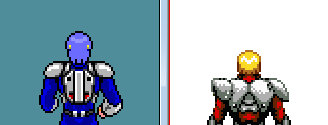
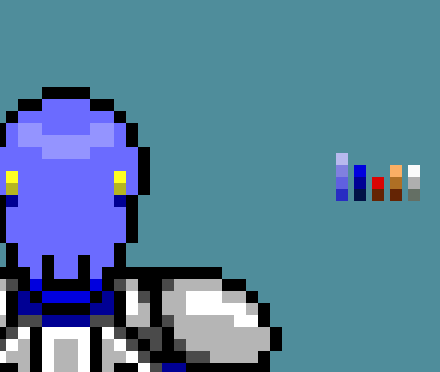
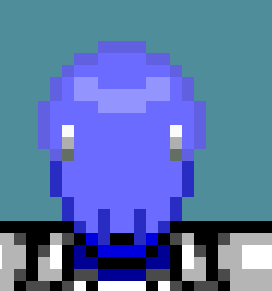
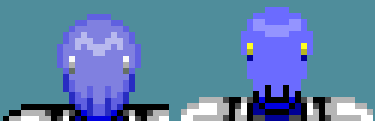
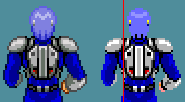
Frankenspriting is a form of spriting so named because the artist hacks apart several other sprites to make one new sprite. A number of people look down on this, claiming it's unoriginal or uninspired. Most of these people also settle for each town to have NPCs that look exactly the same, despite being oceans apart. That's all well and dandy, but laziness of that magnitude doesn't satisfy everyone.

In this workshop, I'm not just going to go over Frankenspriting. I'm going to also cover why we do it, and how the skills you pick up from doing it can be transferred over to other tasks. I'm also going to go over what you need to do this effectively, and later go in-depth, step by step, through making new sprites out of what's already there.

Why do we Frankensprite?
You can make up any excuse you want, but when you think about it, we Frankensprite because we are lazy individuals. It is much faster to slap together a few pieces from existing sprites then it is to come up with something entirely new. That's not to say this is a bad thing; looking back at commercial games put out by big companies like Squaresoft, you can see rampant laziness all over the place. If they have a full staff and can get away with it and still make millions, why can't an indie game designer working all by their lonesome?

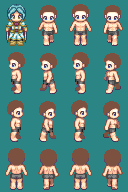
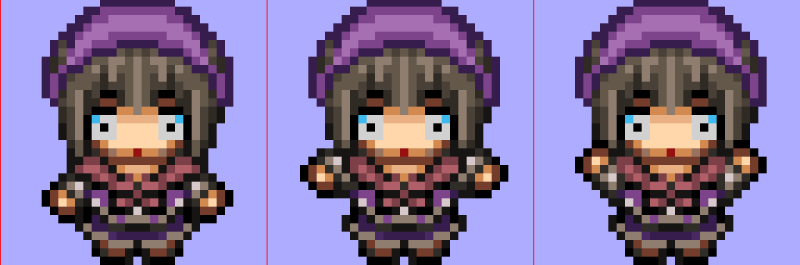
Frankenspriting is not something to look down on. When you have a lot of sprites to do, and not a lot of time to work on them, it is a quick and easy way to get them out, and still achieve a subtle uniqueness in your game. Slapping random parts together can also lead to a new idea for a main character or important NPC, and can even create new monsters. Using skills picked up from Frankenspriting, you can also shape your character in various poses much faster than if you had done it from scratch.

Forms of Frankenspriting
Did you think that just slapping together random body parts was all there was to Frankenspriting? ...well, yeah, that pretty much is all there is to it. However, by being able to take sprite parts and mesh them together properly, you can also:
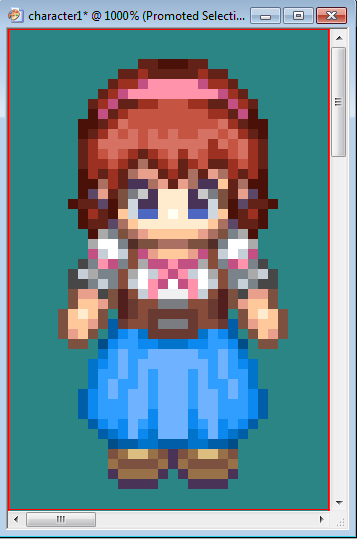
Recolor
Recoloring doesn't seem like it would have much to do with Frankenspriting, but it's actually very important when creating a new sprite this way.
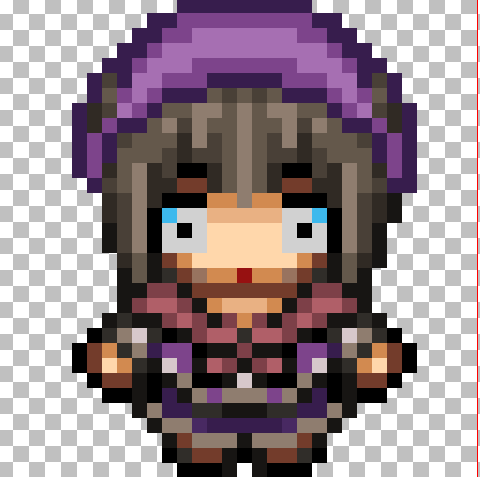
Alter Expressions
Making new face expressions is easy, but what about the poses to go with them?
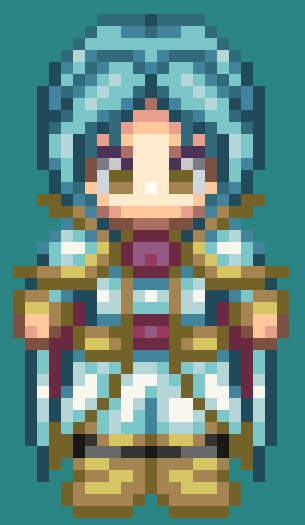
Template Conversion
You like the look of an RTP-style character, but you're using White Ties? Sure, we can work with that.

Update Old Sprites
A great way to get a new sprite is to take an old one and dust the cobwebs off.

Programs and other Tools You will Need
First and foremost, the number one tool you will need no matter what kind of sprite altering you want to do is a simplistic graphics editing program. I put emphasis on simplistic, because you're not really going out of the way creating these sprites, and sometimes a bulkier program can actually hinder you.

So all of you reaching for Photoshop; BAD!

psp9layout.png


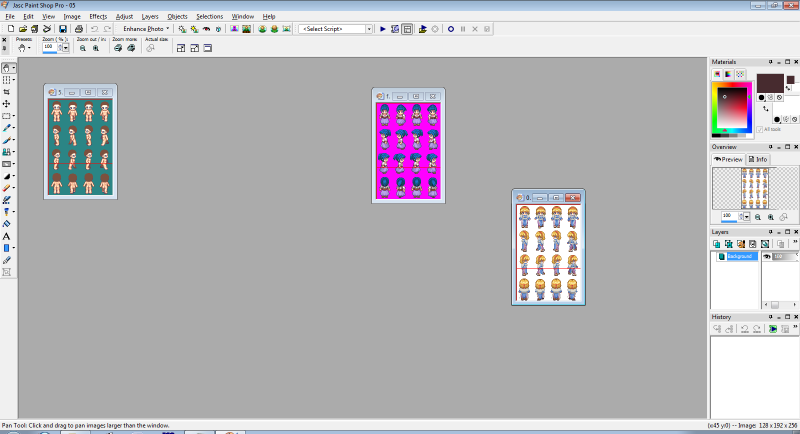
Personally, I use Paintshop Pro 9 for my spriting. It offers layers and transparencies, while still keeping things simple. Plus, the pointer for the paintbrush and similar tools snap to a pixel grid, which is what you need when working on stuff like this. Those with Vista and up, however, should note that PSP9 is not compatible with Windows Aeroglass and will force your scheme into Windows Basic mode. This should switch back afterwards; so it will still run, just do funky things to your pretty desktop while it is. But if you're busy spriting, why should you care about what your desktop looks like?

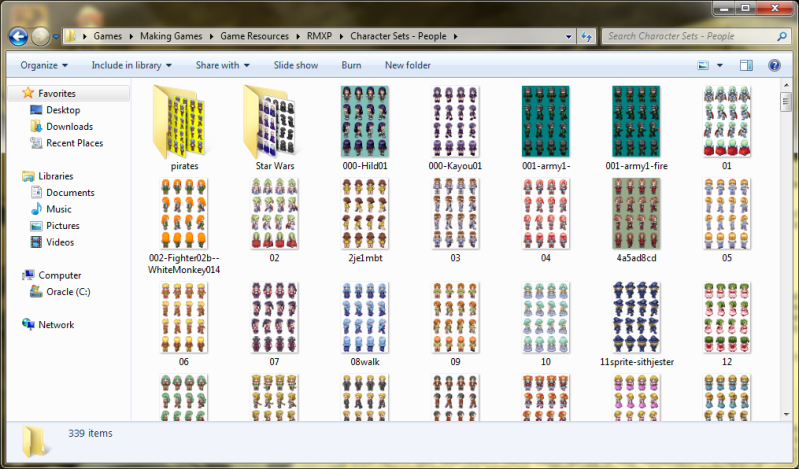
Also, if you're going to be using the RTP template for your Frankensprite, you're going to want a lot of resources to work with. And considering it's RTP, there's plenty to work with out there.

charactersets.png


No, seriously.

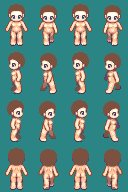
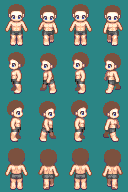
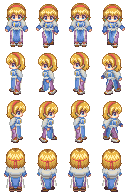
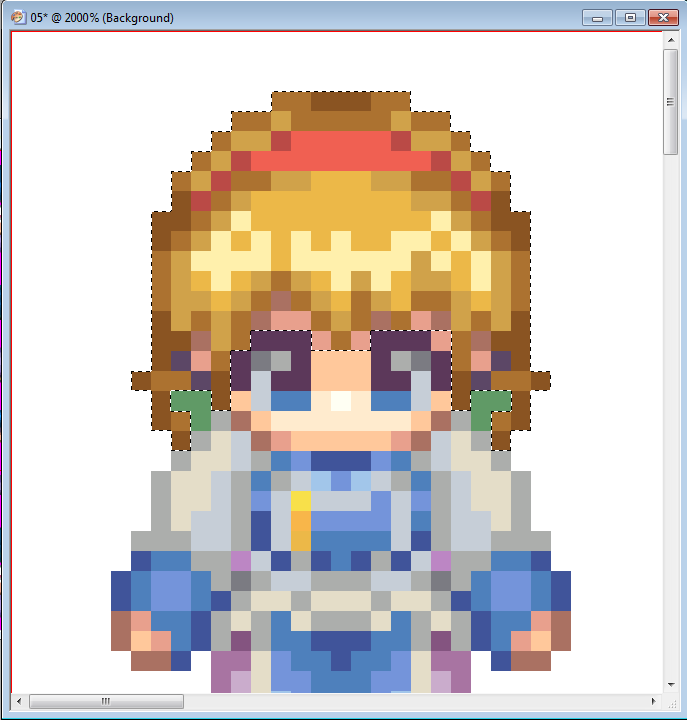
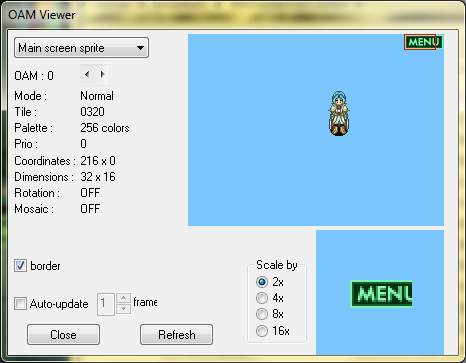
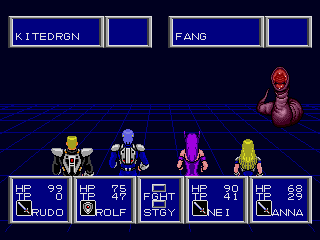
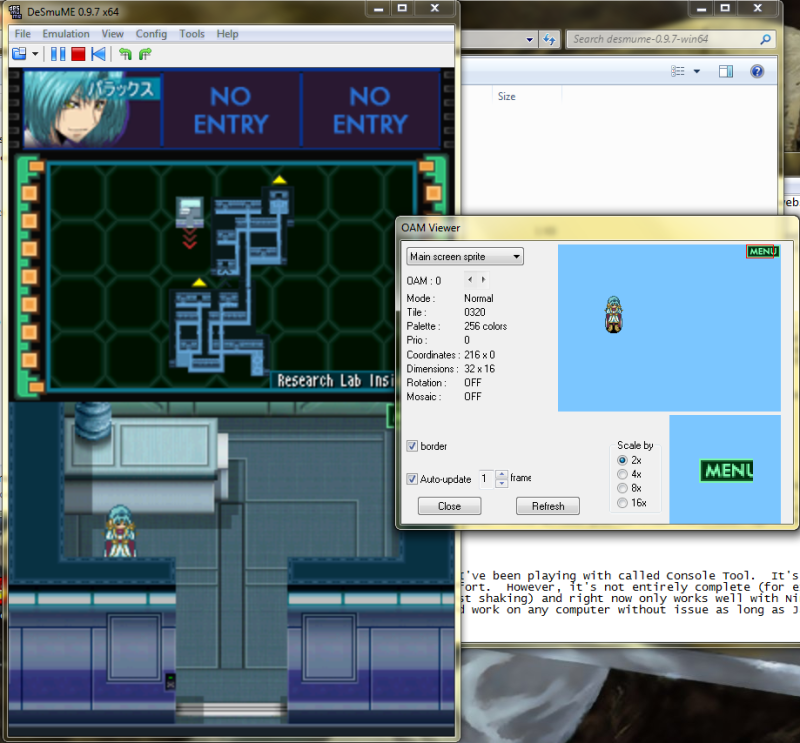
If your going to be using commercial game sprites to Frankensprite with, your going to want a lot of sprites from the same game series, or the same artist (for example, the artists that work on the Disgaea games are pretty easy to spot). Most of these can be found on the Internet -- Spriter's Resource is an especially good source. Sometimes you're just going to need to rip the graphics yourself, but fortunately this has become easier. A special tool called an OAM Viewer is built into emulators like VisualBoyAdvance and DeSmume. This allows you to view individual sprites as they are in the game data, without any overlays or obstacles in the way. When combined with a program like Animget, it allows you to get quality shots with very little effort.

dsemuoamviewer.png


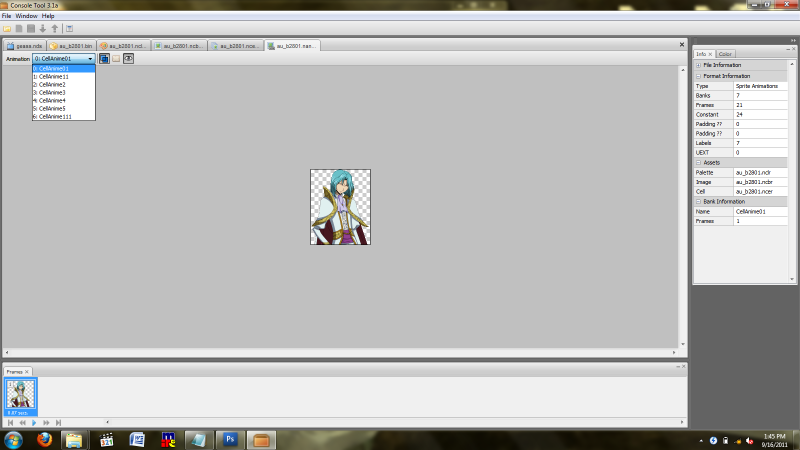
There is also a program I've been playing with called Console Tool. It's a very powerful tool that allows you to look into a game's data. However, it's not entirely complete (for example, it doesn't recognize SOME .pal as a pallet files, which has led to much fist shaking) and right now only works properly with Nintendo DS games (all other formats will just come up with the HEX code for the game), so your success may vary. Console Tool is a JAR executable and should work on any computer without issue as long as Java is installed.

consoleviewer.png
 
The Basics of Frankenspriting

Frankenspriting isn't a difficult thing to do, but it can feel overwhelming at times, especially if you have a lot to do and not a whole lot of time to do it. First and foremost, it's important to visualize what you want the character to look like. Then comes the great hunt through resources to find the pieces you want, and lastly stitch them together. There are not that many steps, but sometimes it can seem daunting, especially if you don't plan ahead.

It's important to have a mental picture in your head before you start. Just diving into your resource collection is all well and good, but doing so and hoping for inspiration to strike doesn't always work. In fact, I can guarentee that you'll be so bored after the first cycle through, that you'll just ragequit. Visualize what you want in your head! Once you do that, stay focused on that mental image; there's a number of ways you can do this, from making quick notes on Notepad, to just doodling it out on a piece of scrap paper. Once you have everything you need, then you can cut out the pieces you need and paste them all together on a template.

A few tips before beginning:

* Know what you're going to be using the character for. If the character is only ever going to be seen from the side, you don't want to go through the effort of spriting all the other directions.
* Know what template you want to use ahead of time. I know that sounds like a no-brainer, but I can't tell you how many times I've decided to swap templates half way through spriting.
* STICK TO THE CURRENT CHARACTER YOU'RE WORKING ON. It's nice to get ideas while you're browsing through your resources, but you don't want to lose sight of what you're doing right now.

For this part of the workshop, we're going to use a lead character idea for a story idea for RMXP I'm playing around with. Our main character is a young woman with shoulder length hair wearing a short-ish dress. We'll be using the RTP template for this, as it's the most common.

First we start by loading up Paint Shop Pro 9 with our template. You always want to start from a blank template, so you don't accidentally end up with anything you don't want.

54.png
58.png


Next, we hit the resource collection and dig out what we want to use for our heroine's hair and dress. It helps to make several passes, with only focusing on one part of the character design at a time. For this sprite, we're going to use the hair from the the blonde sprite and the outfit from the blue haired girl.

05.png
femal_npc01.png


As a personal note, when you go about collecting resources, it helps to actually make note of who does what in the file name of your sprite, so you know who to credit later. Don't just go on random saving binges like someone that shall remain nameless...

Obviously this will be a really simple sprite. This is a workshop, we don't want to go too crazy. Once for a sprite I had to combine two different hair pieces, ears, a shirt, sleeves, pants, boots, and a cape, each from different sprites. Needless to say, that got a little crazy.

Step One
Before you do anything else, select your template that you should have open in PSP9, go to the file menu and select Save As. Save the file as something different, so you don't accidentally save your main character over your template file. I know, it's a stupid thing to do, but accidents happen.

The Real Step One
Let's do the hair on the front view first. Take your selection tool and highlight the hair on the blonde sprite.

highlight.png


I'm blind. Hopefully you don't need to zoom in this much.

You'll notice that I didn't just highlight the hair, but I also highlighted the shadow on the skin. This just makes life easier, and also gives you a reference point on where to paste the hair on the new sprite. Press Ctrl+C to copy the image part to the clipboard. If you are using PSP9, select your template image and press Ctrl+E to paste into the image.

what.png


For some weird reason, this is happening, and it isn't supposed to. I think it has something to do with the fact that I'm on Windows 7 64-bit, so the program is being a little wonky. Just keep in mind that this can happen, but it doesn't really matter, because we're going to be using layers to sort through the different sprite pieces anyway.

If you're using Photoshop (BAD!), the program puts the paste on a new layer automatically, but if you're using PSP9, it'll come up as a floating selection on your layer list. Right click the floating selection on the layer list, and select promote the selection to a new layer. Then you can erase the white before positioning the hair if this happened to you.

better.png


Obviously you're going to want to fill in anything that turns up blank, but we'll do that later. Also, because the hair doesn't move, you can copy it over to the other front frames of the sprite.

Now, normally you're going to want to do all the hair for the various poses before moving on, but for now, let's move on to the next step.

Step Two
Like with the hair, let's copy over the dress from the other sprite. Be sure to promote the dress selection to ANOTHER layer; don't put it on the same layer as the hair. You're going to want to do this, even if you don't have issues with transparency.

dress.png


Step Three
Now, do the same for all other poses of the sprite. Remember to only copy over what you need, and to keep the dress parts on their own layer, with the hair parts on the other. Do not put anything on the bottom layer for now. Also, because the hair doesn't move at all, we only need to copy over one frame for each pose. This will be the end result:

progress.png


Obviously if you have hair that sways with the sprite movement, you're going to want to copy over those frames as well.

Step Four
Fill in anything that doesn't cover the template and is supposed to. In best case scenarios, you won't have that much to fill in, or you'll have very little. Keep in mind that sometimes you can end up with a lot of weirdness, and you may have to guess and test what should and shouldn't go there. While you're at it, you also might want to get rid of things that you don't want, like the tie on the back of the head in this case.

progress2.png


Step Five
Recoloring. You don't always need to recolor, but you don't always get lucky and end up with the colors you want when you go fishing for parts. For this sprite, I want to change... well, everything; she'd look better with red hair and blue dress. I'll keep the pink ribbon, and make the hairband the same color. Now you're welcome to make your own pallets, or you can just be lazy like me and save a whole bunch of them. I forget where I got all my pallets from, but you're welcome to download what I have.

Download Pallets

Okay, since the headband is already red, we're going to recolor that first, then the rest of the hair. You might want to make your recolor work on another layer, that way if you don't like it, you can just delete the layer. Remember if you do it this way to make a separate layer for each part you're recoloring, not just a separate recolor layer.

Best way to recolor is to start from the inside, and work your way out to the darker colors.

recolor.png


If your satisfied with the colors, then fill out the rest of the sprite.

recolorfinish.png


Step Six
Now all that's left is to copy over duplicate parts, inverting and mirroring as needed. For the second idle frame, as well as the right facing direction, it helps to have flattened all the layers, and then copy, paste, and mirror as needed.

And done.


By using these steps, you can create an endless number of combinations for an endless number of characters.

 
Using Frankenspriting to Template Swap

A million years ago, I was insanely fond of InvisibleDrifter's Tyke2 sprite template, and went about converting everything I had over to this style.

anathlaRTP.png
anathlatyke2.png


You can see why I never get anything done. :\

But that's not my point. My point is that it is surprisingly easy to convert from one template style to another, especially if the templates are both small. To demonstrate this, I'm going to use my favorite example: converting from a commercial game template to RMXP's RTP template.

Another million years ago, I was attempting to put out a Yuugiou game. Obviously this failed miserably, but quite a few people said the sprites I had finished for it were very good. Well, here's where I confess: 100% of the sprites were Frankensprites, or had parts that were Frankensprited. I did this by taking clothing parts from existing sprites (like in the post above), and the hair of sprites from the commercial Yuugiou games, The Sacred Cards and Reshief of Destruction.

For this part of the Frankensprite Workshop, I'm going to walk you through how I did this. I'll be using sprites from the Code Geass DS game, specifically the alternate universe character, Prince Pullox, created exclusively for this game. This can be long and involved, so unlike before, I will only be doing the front idle sprite for this character.

Keep in mind this works best for small areas, like hair, or a shirt. Very rarely are you going to want to convert over an ENTIRE sprite; you can usually find similar pieces in the same style as the template you're converting to, Frankensprite THOSE over to your character, and alter them to match.

Step One
First, gather everything you'll need. Right now, you're going to need the male RTP template, and the necessary sprite poses for the character in question. Obviously, unless you get lucky and find sprite rips from websites like the Spriter's Resource, you're going to have to download a ROM of the game and rip it yourself. Don't ask where to find ROMs, I'm sure you can figure that out by yourself.

Pullox appears in the DS Code Geass game, so we'll need a DS emulator, and get to him in the game. I personally recommend DeSmume 0.9.7, simply because it is the best damn DS emulator out there. If you want to sprite Pullox yourself, you can either playthrough to the second or third playthrough, or you can download my save file.

Considering the game is only partially translated from Japanese, I recommend downloading my save file.

Code Geass Save State Download

Put it in your States folder in the DeSmume root folder. Make sure the name of the state and your Geass ROM are the same.

Now, load up your ROM in DeSmume. Once loaded, go to File > Load State. You should see the state in Slot 1; if not, the ROMs are not named the same or you have the wrong game or a bad dump of the game. It should not matter if you have the unpatched Code Geass game, or if you have the semi-translation patch applied. If you see the state in Slot 1, select it, and you should be presented with this screen:

geassscreen.png


Meet Pullox. He has issues.

Now, this screen isn't bad, but we're not going to always have an ideal image like this. Commercial games like to use overlays and objects obscuring our view of the characters just like we do. So, what we're going to want to do is first Pause the emulation so we don't have to worry about Pullox going into his spastic idle frames while we're taking a snap shot.

Once paused, go into Tools > View OAM. Another screen should pop up.

oampullox.png


This is the OAM viewer, a sprite viewer built into DeSmume. This allows you to view any sprite on either screen, without any overlays or objects obscuring your view. The main emulation screen is still responding while you have this screen up, so you can pause the emulation like we did, then force the emulator to advance frame by frame, or even use an outside program like Animget to get perfect shots of the character in motion. For this workshop, however, this is the only frame I'll need.

Step Two
Load up your RTP template and your picture of Pullox into PSP9, or your image program of choice. In this example, you actually do not need to resize the commercial sprite. The Code Geass sprites are actually pretty big, and you can even use them with the RTP tilesets. Keep in mind that this is not always the case, and usually you'll need to double the size of the sprite.

resize.png


These are the settings you'll need when you have to resize an image. Pixel resize, or nearest neighbor, is ESSENTIAL when working with pixel work.

Step Three
Like in the workshop above, let's start by selecting the hair on our Pullox sprite, and copying it over to our template. However, this time, you're not going to want to copy over the shadows on the skin of the original sprite, because it's quite different. Remember to promote the selection to a new layer on your new sprite.

pullox1.png


As you can see, it doesn't quite fit. Well, it doesn't fit at all. This means we need to cut it up a bit. Use the selection tool to highlight and move areas of the hair, so that they end up in positions relative to the original sprite.

pullox2.png


We're going to have a lot of work ahead of us.

Step Four
We're going to want to fill in the areas that are now empty from moving the parts of the hair around. This requires some spriting knowledge, so again, I must direct you to Peri's Pixel Workshop if you haven't read over it already. This will really help you when it comes to situations like this.

pullox3.png


The finished hair.

Doing more than the hair is difficult, but not impossible. Personally, I'd rather take RTP pieces and manipulate them so they resemble the commercial sprite. What you choose is up to you, but the steps remain the same.

pullox4.png
pulloxRTP.png


Prince Pullox front view, done.
 
Manipulating Emotions
Emotions are easy to make on a sprite; it's just a simple manipulation of the eyes for the basic emotions. But what about more advanced stuff? You can actually use the manipulation skills you pick up from Frankenspriting to do poses to go with your character's emotions.

This time, I'll deviate from RMXPs RTP, and use a RMVX Kaduki sprite that I use for my character, Rune.


Step One
Open up your sprite in PSP9. First, we want to do our emotion on the front facing idle sprite, as this is the frame that we'll be using for the pose. We're going to go with a surprised look.

runesurprised.png


Now, copy this frame to the other front facing views. Rune's background was already transparent when I opened the image, so you might want to fill it in, so it will be easier to copy and paste the poses over.

Step Two
Now we get to the actual pose. We're going to have Rune flailing her arms, so we're going to be manipulating the arms on two of the frames. To do this right, we'll be working backwards. Go to the third and final frame of the sprite, highlight both arms, and cut to a new layer. If you're using PSP9, you can just move the arms and put them back in position, and floating selection will appear on your layers list.

Now, with the arms still highlighted, select Flip from your respective image menu and position the arms properly.

runewhoops.png


This might happen if you're in PSP9. I don't know why it does that sometimes, but all you have to do is put your flipped arms on a new layer, and then just delete the previous layer.

runearms1.png


Now, just fill in the arms, and fix the shadow on her shawl.

runearms2.png


Beautiful.

Step Three
Now we're going to want to go to the middle frame of the sprite. Here, Rune's arms are going to be sticking straight out, so we want to move each individual line of pixels until her arms are straight out from her.

runearms3.png


Now, you want to select the arms, and pull them out from the sprite by one pixel.

runearms4.png


Now, fill in the empty spaces.

runearmsdone.png


And that's it!

rune_e.png
 
Improving Sprites from Old Games
Older games are notorious for taking short cuts on graphics in order to make more room on the ROM chips for data to be stored. Now usually, this is in the form of smaller, less detailed sprites or in the form of the same sprite used multiple times, but some games try to cheat and even worse, some games try to do both. The biggest offender of this would be Phantasy Star II.

phantasystar2.png


When you play the game, you notice a lot of repeated characters in towns, and the walking sprites are very small and not exactly eye catching. And the while the world maps are beautiful, the dungeons -- THE DREADED DUNGEONS -- almost all look the same. When you get into the battles, however, the graphics look very detailed, like a lot of care was put into the models. But take a closer look at the idle sprite of main character, Rolf:

rolf.png


This is what the sprite really looks like: there is no outline on 90% of the battle sprites in this game. The only sprites that have an outline are the melee sprites, that are right up against the monsters. Not even the monsters have outlines. Without outlines, the graphics have a slightly smaller size, and because the battle background is near-black, the player would never know unless they took a close look like we just did.

Step One
If we were to take Phantasy Star II and update the sprites so that they could properly be displayed on a detailed background, we need to start by outlining the sprites. Many of the sprites are repeated, so just outline the ones that are different: idle, use item/skill, and use gun.

rolfsheet.png


Much better. Don't worry about the melee pose for now; for this example, we're more concerned with the bigger and easier to see sprites for practice. Also, you'll note some color discrepancy in this sheet. I had a stroke of laziness and used sprites ripped by another individual, which strangely had brighter colors than the sprite I had to rip (the gun use sprite). I will be fixing this as I go along, but save yourself the trouble: if you're going to use sprites ripped from a game, rip them yourself. As stated above, many emulators nowadays have tools built in to make sprite ripping easier to do.

Anyway, just with an outline, the sprites look so much better, but we're not going to stop there. We want to give these sprites a more updated look. We don't have to do too much work; there is a lot of detail there already, so it won't be like updating graphics from the old GBC Pokemon games to match their DS counterparts.

Step Two
The same steps apply to both this and the Pokemon example however, and the next step is finding a reference. The best thing to use as a reference is sprites from later on in a multipart series; if the sprites you have is from a game not part of a multipart series, then find a close match, or look for games from the same artist or company (for example, Atlus games, creators of Disgaea, all have games that have a similar style, even though they're not necessarily connected). So we'll be dragging out a sprite of Rolf's closest match in the Phantasy Star series: Chaz from Phantasy Star IV.

rolfchaz.png


Aside from the fact that PS4 characters keep their arms down when they're not using items, there's very little difference between the two.

Step Three
First thing's first; we're going to set out our color pallet, using Chaz's colors as a base, changing them to match Rolf's pallet as needed.

colors.png


Each area on Rolf's pallet has mostly two colors; only the chest plate has more than two. The only part of Rolf that should have two colors is the red lights on the chest plate, because they only take up a few pixels. Also, because we're updating the sprite to match Rolf's current character art, the pieces of his circlet that can be seen from the back are the wrong color, so we need to change those. Lastly, the Genesis organizes its sprites in 16 x 16 tiles, while RMXP is double that. The sprite has already been enlarged to twice it's normal size, and we're going to keep with the 2 pixel brush size to match. This is only a workshop, so we want to keep our sanity. However, you are more than welcome to go the extra mile and go down to 1 pixel, but keep in mind you'll need to use more colors if you do. I suggest checking out Peri's Pixel Workshop if you haven't already for tips on how to do this.

Step Four
Now, let's start with the hair. We're going to first switch the color of the circlet to the proper gray, and also get rid of the black. Rolf's hair is a light blue, so the black is too much of a contrast. Let's take care of the circlet and start with the outline.

rolfhair1.png


Working with colors like this can make it difficult to see what you're doing; you might want to work backwards when you do this, or empty out the outline area, and keep a copy of it on hand for reference while you work. Don't be afraid to dirty up the empty areas of your sprite sheet; it's easy enough to clean up.

Now let's finish the hair.

rolfhair2.png


Big improvement, hunh?

Step Five
Now to use the same technique with the hair to update the rest of the sprite. As you go, you might find yourself updating your color pallet as well. For example, I added another darker gray that was already on the sprite, as well as got rid of the white in the chest piece, replacing it with a very light gray.

Now you'll notice that I needed to do very little changes to the body suit portion of Rolf's sprite. This is because the body suit portion was farely well sprited to begin with. Don't feel like you have to change everything in order to improve a sprite. You should always take advantage of what's there that's acceptable.

rolffinal.png


Big difference. There are still parts that I'm not entirely happy with, but that will happen with any kind of sprite work; you're always going to find things to nitpick about. For now, however, this gets the point of this aspect of the workshop across. There is much better shading in the chest piece and shoulder guards, and the sprite as a whole looks fuller and complete.

ingame.png


Looks wonderful in game with the painted backgrounds from Phantasy Star: Generation 2 as well.
 
:mad:

this is good for what it is. don't take this the wrong way, skyla, this guide is well-put together and nicely thought out.

but honestly we shouldn't be encouraging this kind of stuff (a lot of your recolors display no understanding of color or contrast, not to mention frankenspriting promotes blatant plagiarism). one of the reasons that this community stands out against rrr or rmvx is that we have tremendous artistic talent and a significant amount of users who produce original content.

if this wasn't endorsed as an official workshop for the site, i'd be a lot nicer! but this tutorial belongs on a child's game rip site, not a site for game development—even hobby game development. this is a massive step backwards from the past few workshops we've had here.
 
I wholeheartedly disagree.

You're going to have to get used to the fact that people making games as a hobby are in it to make games as a hobby. Not all game-making enthusiasts are terribly concerned with perfection in detail, they just want to make something that people can play. Hell, I've seen plenty of games that aren't anything special visually, which are super fun anyway (Terraria is a great, recent example of this).

Yes, frankenspriting is lazy--ideally, all people would make all-original sprites of their own, and be capable of coming up with strict palettes, and adhering to pixel art standards ... Etc. But the fact of the matter is, that is perhaps the MOST time-consuming and daunting part of game-making.

There's a big reason why I burnt myself out on making my own game--I couldn't keep up with the enormous amount of original graphical content I needed to come up with, which still was up to par with what I could consider something I could be proud of. And you know what? I really, really wish that I could just be satisfied with workarounds and jimmying the RTP to meet the same end, because I would have gotten a hell of a lot further in production.

Atemu went over a lot of super good points in this guide--things that any normal member, who hasn't really made many attempts at creating original content for a game before, could use and refer to!

And in regards to the concepts of color & contrast ... I know that I, personally, have a very hard time with color & palettes, as I'm partially color blind.
Other people just need to learn the tools of the trade so they can play with it, experiment, and figure out how to work with color & contrast in a visually aesthetic way. Not everyone has an eye for it, and this guide did not set out to teach people color theory, it set out to show a layman what steps to complete to do something that can be useful to anyone starting out.


Lastly, I encourage everyone to try to do things for themselves. What's more important than doing something "the right way"? JUST DOING IT for THEMSELVES. There are too many requests out there on the requests board which only ask for something relatively simple which could be executed by paying attention to this guide. Perhaps, if they learned to do this for themselves, they'd start to appreciate the art of it, and want to get better at it, and seek out advice on how to improve?

When I started out spriting (like most people, I'd imagine), I started with frankenspriting.
If people want to hone their abilities further after they get the hang of this, then they will have already gotten a good grasp of the tools of the trade and some workarounds to speed up their production.
(And before anyone says it, no, this is not comparable to people who start their road to character art by drawing animes first. Spriting and drawing are two totally different realms of art & require different skillsets/levels of detail.)

Because, like I said, it's no fun to make a game if you're going to be so overzealous about quality of art, unless you just have unlimited time to kill.

It's important for people to exist who have scruples about these sorts of things, but nothing would ever get done if everyone were so adamant about perfection. I realize this is arguing quality vs. quantity, but it's an especially valid argument, when debating something one does for a HOBBY.
 
Ven put it into perspective pretty great, Im just mirroring. This whole thing about how certain things just dont fit into a pedigree is a terrible way to think and you close your mind to so many doors and instead come off as someone who has their nose way too high in the hair. Game making needs to accommodate everyone and their levels. Do we encourage custom pixeling? Hell yes we do. But not everyone wants to learn how to pixel in order to make a game and instead would like to be part of the story board process or the actual game making process. Frankenspriting is the middle ground between using RTP and custom and its something someone can approach with little practice. So yes, we strongly endorse this workshop as an official workshop because it teaches people interested in game making a reasonable way to make semi-original sprites instead of using the RTP or free-sprites you find on the internet. Even better, Frankenspriting may be the first step for them actually learning how to pixel or the stepping stone that at least gets them interested. Again, pedigree closes so much possibilities and opportunities and makes it so that you cant see the whole picture and idea. The idea that someone could actually be annoyed about a detailed Frankenspriting workshop that covers so many points, in my opinion, is a little silly.
 

Cait

Member

Wow! Thank you for the information. I kind of think that great sprinters likely start franken sprinting and then go to creating their own, because they see how it works. You have to start with baby steps, before you can walk. I am going to read this in more detail later.
 
You're going to have to get used to the fact that people making games as a hobby are in it to make games as a hobby.

i know this isn't really directed at me unless you're totally missing a huge part of my philosophy to game-making maybe just because you haven't seen a lot of my recent posts on game design. i've said it a lot of times over the past few months that i do consider this nothing more than a hobby and that anyone here should be doing it for fun (i've even gone as far as to try and encourage the direction of the site as a "lets make games for fun" versus the whole homebrew indie dev stuff but it didn't take). but that wasn't my point at all so let's not bring that here.

I got started by frankenspriting too. It's a great learning tool, yeah. I'm not bashing the process, but I disagree with the way it's presented here and encouraged.

let me explain it this way:

my problem with this workshop is that it's presented in a way that says "hey this is a good alternative to doing actual pixel art". and simply put, it's not. if it was presented in a way that outright suggested it as a stepping stone to legitimate pixel work, then it'd be a different story. A big part of my criticism is that this comes after peri's spriting workshop and not before it, and that kind of ordering throws askew the idea of frankenspriting as a starting point and a learning point (and before you even go there, I get that the chronology probably wasn't intended to have that kind of meaning but it still gives off that impression to anybody who has been following all of them).

There was a great thread on pixelation a while ago (damn i think it might have been a few years ago by now) that had a huge impact on the way I look at ripping vs. spriting. the members of pixelation were pretty much in a war with the kids from the sprite-ripping community over the "pixel art" page on Wikipedia—the ripping kiddies(you know, those kids who fill massive sprite sheets with poorly recolored sonic sprites and write "GIVE CREDIT TO SONICGOKU1994" all over their sheets) were including recoloring and editing game sprites as techniques into the primary "pixel art" article—to the point where they were including elements of ripper culture like megaman sprite comics. eventually the pixelation guys just had to give up on it (even though the page looks a bit better today).

okay so maybe that was a little tangential, but I'm not sitting here saying "don't frankensprite it's bad". I said in my first post that these tutorials are really good for what they're teaching—but my problem is that frankenspriting is not some kind of magic alternative to making quality sprites of your own: these frankensprites are passable edits of other people's work, and that might be okay, but they're not quality and they're not something that anybody should be proud of for making.

by comparison, like I mentioned in my first post, the other big rpg maker sites (rrr and rmvx) are huge on frankenspriting and recoloring. their resource forums are loaded with graphics that all look pretty much the same. now don't get me wrong, i'm not bashing those sites at all. it's fine that they do this, i'm not trying to stir up drama (although when people demand credit for splicing up other peoples' work that I find in incredibly poor taste and downright disgusting). but at what point do we say "okay i've seen a few hundred faces with the same hair i'm done yup yup". hbgames is a great fucking community with a tremendous amount of talent and if we give the message that frankenspriting is enough then a lot of the people here aren't going to be motivated to reach their full potential.

also plain and simple ripping graphics from games is plagiarism.

so for the sake of brevity and clarity my thesis is this:

frankenspriting and recoloring is fine as a stepping stone into the spriting process but isn't a substitute for learning to do the real thing.
 
Frankenspriting definitely isn't on equal footing with original pixel art in terms of artistic achievement and quality of product, but I do think that frankenspriting graphics for a game is absolutely a legitimate design choice. When's the last time you saw someone with custom graphics actually release something? In principle, yeah, frankenspriting should just be a stepping-stone to greater things. But practically it can't always work out that way due to time and effort and talent and focus restrictions, and I don't think there's anything wrong with being realistic about that. Consider that this is a hobbyist site, as you said, and that people should be making these games first and foremost for fun, so quality (while important) should be a secondary consideration to people having fun.

I don't think this thread was intended to glorify frankenspriting or pass it off as being on the same level as actually creating your original art. It's just supposed to give people a small measure of self-sufficiency where graphics are concerned. And it does a great job of that, so I think it's fine.
 
Consider that this is a hobbyist site, as you said, and that people should be making these games first and foremost for fun, so quality (while important) should be a secondary consideration to people having fun.

Honestly this is where I'm just getting confused. How is it not fun to improve your own artistic skills? imo this "fun" argument has no place here at all, because that's implying that spriting isn't fun.

I think I'm just seriously missing the point here or something. Maybe I'm missing the function of these workshops. If they're meant to be completely isolated tutorials then my entire argument crumbles because it's based on the idea that as official workshops, all of these articles are intended to be experienced as a collection. If that's not the case then fuck me because I'm talking out of my ass, but maybe then that should be made clearer.

The purpose of a workshop is to teach people how to improve—how to get better. It should be a learning tool. And to imply that frankenspriting is enough or an alternative just isn't getting there. That idea contradicts the other workshops that encourage original pixel art. Teach people to frankensprite—yes, do!! there's nothing wrong with that—but teach them to do it in the context of real pixel art development. Like plenty of people have said, it's a wonderful starting point. But in a game development "workshop" that's all it should be: this tutorial should be part one or a introduction to spriting or something, not an alternative.
 
Uncle Despain":2crfr3tv said:
Honestly this is where I'm just getting confused. How is it not fun to improve your own artistic skills? imo this "fun" argument has no place here at all, because that's implying that spriting isn't fun.
Not everyone has fun improving their craft. Some people just like making stuff, and looking at their work critically and realizing it isn't good makes them enjoy it less, so they don't. I don't see this as an inherently inferior approach to game development. The product isn't as good, but since making a good product wasn't the point, it's just a different way of experiencing the hobby.

Also, game development is extremely interdisciplinary, requiring art and music and writing and programming and design. Maybe the person reading this tutorial is into game development for one of those things instead, but while he may not be at all interested in art, he still needs passable graphics. Or again, he might just not have time to do a bunch of elaborate custom stuff.

I think I'm just seriously missing the point here or something. Maybe I'm missing the function of these workshops. If they're meant to be completely isolated tutorials then my entire argument crumbles because it's based on the idea that as official workshops, all of these articles are intended to be experienced as a collection. If that's not the case then fuck me because I'm talking out of my ass, but maybe then that should be made clearer.
I don't think we put that much thought into it, honestly, but I would say they're not super connected except for the ones that specifically are. The order was determined by who had a free week when rather than presentation of content. If we were going to actually organize these, I would probably put frankenspriting as an introduction to pixel art since a lot of people start with that (but with the understanding that you shouldn't feel compelled to master pixel art to make a game).

The purpose of a workshop is to teach people how to improve—how to get better. It should be a learning tool. And to imply that frankenspriting is enough or an alternative just isn't getting there. Teach people to frankensprite—yes, do!! there's nothing wrong with that—but teach them to do it in the context of real pixel art development. Like plenty of people have said, it's a wonderful starting point. But in a game development "iworkshop" that's all it should be: this tutorial should be part one or a introduction to spriting or something, not an alternative.
I see this workshop as being aimed not at the people who want artistic improvement but at the people who want to produce games. Remember that artistic improvement in the process of making games can mean lots of different things for different people depending on what interests them about game development, and moreover that not everyone sees getting better as a necessary part of enjoying a hobby.

Intentionally learning frankenspriting and intentionally learning pixel art are two inherently different approaches. The latter cares about learning art, and the former just wants functional graphics. I don't see anything wrong with the that.
 
I see this workshop as being aimed not at the people who want artistic improvement but at the people who want to produce games.

Okay I guess this makes sense, and that's where the disconnect was confusing me. I'm seeing this article in the same series as your pixel art article, with the implication that they work together as a cohesive graphical workshop. But if this isn't meant to be read alongside the other tutorials then yeah I'm starting to see where you're coming from.

That's why my original criticism was that this shouldn't be a part of the official series—because it contradicts the other articles that teach original spriting. But what I'm starting to understand now is that this is intended for a different audience and it's not intended to be read alongside the pixel tutorial.

This is a tutorial that teaches a valuable time-saving trick for non-spriters rather than a full-on "workshop" (I think of the "workshop" as the experience of learning from these tutorials, evaluating them within the context of each other, and applying them to improving your skills); and from that perspective it's great and I was wrong. If the purpose of this was only to show "how to frankensprite" then it's fucking great (I never debated that—in my first post I say "this is good for what it is").

Honestly it seems like this comes down to a structural problem with the workshops as a series, or rather an inconsistency in the way they are intended to be read. So now I understand that part of the debate—so thanks Peri. :kiss:

But I actually had two arguments squished together (appy polly loggies if that wasn't clear (i don't even think it was clear to myself until peri helped me sort this out)). so sorry to disappoint but I can't stop just yet. :box:

We still have this kind of attitude in the original articles:

  • A number of people look down on this, claiming it's unoriginal
  • Frankenspriting is not something to look down on
  • Frankenspriting is a form of spriting

And these kinds of statements seem like some underhanded justification for a process that absolutely should be looked down upon (not by everyone, maybe, and not by the target audience, but by real pixel artists indeed). When I spend six hours perfecting a sprite, with colors individually crafted by me, that began with nothing but a blank canvas: I absolutely have the right to look down on someone who splices pieces of other people's work together and says that it's just as legitimate.

And any pixel artist should feel the same way (this is where my anecdote about the Wiki page comes into play).

It's like those kids on DeviantArt that trace a picture of Sonic the Hedgehog, draw horns on him and then watermark "OC DO NOT STEAL" all over it. Sure—it's fun if you're doing this shit for yourself. Knock yourself out, scooter—have a blast. But you can not say that you are doing something that's on the same level as the person who's actually doing it. That's plain insulting.
 

Eventing_Guy

Awesome Bro

I see this workshop as being aimed not at the people who want artistic improvement but at the people who want to produce games.

I see both... I HAVE improved on my MS paint spriting and made stuff for
people who just wanted to produce a game.

- I have done a couple for people... :thumb:

Some people lose intrest JUST because they don't have something that would
fit with what they want in their game. and they do not have ANY artistic talent

- Remember that everyone is good at something but not everything.
 
Yeah, frankenspriting can definitely help you improve your general spriting skills. I started out with pixel art that way, and I know a lot of other artists who did as well. But frankenspriting isn't normally something you aspire to if you're looking to really get good at pixel art. But still, it can lead to that even if your goals are short-term graphics production.
 

Raze

Member

In all honesty, this is a good stepping stone for those who have just started spriting and have little experience. It gets them in the process of spriting in an easy way; from here, they can head over to the other workshops and see how to improve themselves.

Case in point:

Frankenspriting is a good stepping stone, which I find to be essential for a beginning spriter - not intermediate or advanced.
 
Coming from someone who's tried and failed to develop any real talent in spriting, just got fed up and started hiring people to do it for me. I like this workshop, it's given me a few insights into what I can do to improve the sprites that I do make. That's not to knock Peri's previous Spriting Workshop it's really excellent also gave me a good few tips but personally I really suck at sprite-making, and I don't really enjoy making it much either. I find it can be monotonous and boring, especially for someone who works more with words as I do.

I did like the section on going from one template to another because it's something I'm working on right now, in fact it's the initial example that was given, RTP to White Ties (they're similar but WT is better proportioned and doesn't use the RTP's horrible palette, which I've now had it drilled into my head by Peri and Atoa). So this workshop is helping people like me who aren't spriting experts and don't have the unlimited time and patience to learn it fully, nor the natural talent of people like Peri and Despain.
 
Without trying to get into the discussion on whether or not frankenspriting is cool or not (hint: you don't judge music tutorials on whether or not you like music), let me just drop two quick inputs:

  • the guide tells you well what to do when you want to frank the shit out of sprites, so it does it's job... thumbs up for the massive effort besides.
  • saying that Photoshop is a bad choice because you personally don't like it is kind of cheesy... I'd surely have an easier time working with Photoshop (which I'm working with an average 7.38 hours a day) than to get used to a *ahem* last-century graphic program such as PSP... all simplicity taken into consideration.

yay lists
 
Don't get me wrong, I love photoshop. I just don't feel it's very good for simple spriting, simply because the pointer for the paintbrush/pencil/whatever does not lock to a grid like it does in Paintshop. Unless there is a way to make it do so, then I retract my statement about photoshop being bad for this.
 

Thank you for viewing

HBGames is a leading amateur video game development forum and Discord server open to all ability levels. Feel free to have a nosey around!

Discord

Join our growing and active Discord server to discuss all aspects of game making in a relaxed environment. Join Us

Content

  • Our Games
  • Games in Development
  • Emoji by Twemoji.
    Top